关于Meta发布的第一个致力于图像分割的基础模型Segment Anything Model在昨天发布的文章有简要介绍:
【AI工具】MetaAI发布分割一切的AI模型——Segment Anything Model (SAM)
昨天是在官方在线平台体验了下,那么本次就在本地run个demo:
环境安装:
首先官方给到的依赖要求如下:
-
python>=3.8
-
pytorch>=1.7
-
torchvision>=0.8
pip install git+https://github.com/facebookresearch/segment-anything.git也可以克隆到本地在安装:
git clone git@github.com:facebookresearch/segment-anything.gitcd segment-anything; pip install -e .
另外,还需要下载一个 model checkpoint:
https://github.com/facebookresearch/segment-anything#model-checkpoints运行模型:
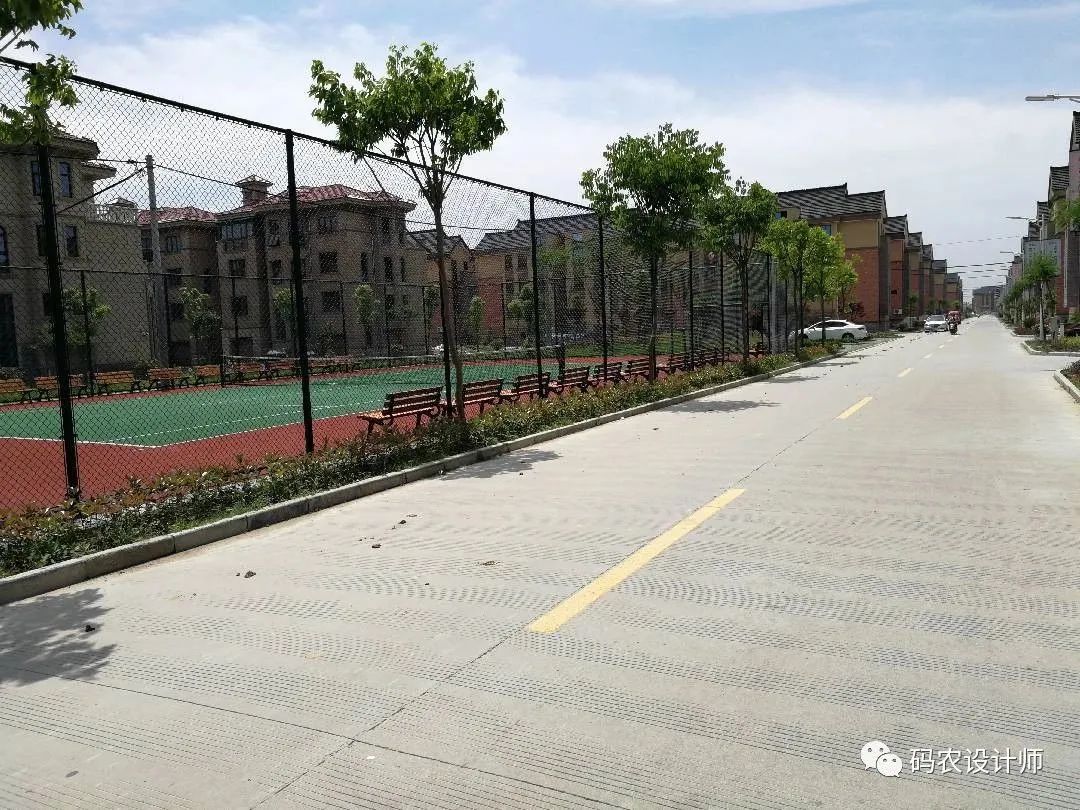
以下面的图像作为demo示例(使用cv2读取图像,并使用matplotlib可视化图像):
 1import numpy as np
 2import matplotlib.pyplot as plt
 3import cv2
 4
 5image = cv2.imread('./images/image_1.jpg')
 6image = cv2.cvtColor(image, cv2.COLOR_BGR2RGB)
 7plt.figure(figsize=(20,20))
 8plt.imshow(image)
 9plt.axis('off')
10plt.show()

加载完图像后,只需几行代码就可以使用模型自动对图像进行语义分割。
代码如下:
 1sam_checkpoint = "下载的model checkpoint存放地址"
 2device = "cuda"
 3model_type = "模型类别名称(要与下载的model checkpoint对应)"
 4
 5from segment_anything import sam_model_registry, SamAutomaticMaskGenerator
 6sam = sam_model_registry[model_type](checkpoint=sam_checkpoint)
 7sam.to(device=device)
 8mask_generator = SamAutomaticMaskGenerator(sam)
 9
10masks = mask_generator.generate(image)
需要注意的是,可以使用以下可调参数,控制采样点的密度或者降低阈值等操作,本次使用默认参数:
1mask_generator_2 = SamAutomaticMaskGenerator(
2    model=sam,
3    points_per_side=32,
4    pred_iou_thresh=0.86,
5    stability_score_thresh=0.92,
6    crop_n_layers=1,
7    crop_n_points_downscale_factor=2,
8    min_mask_region_area=100,  # Requires open-cv to run post-processing
9)
运行上述代码,此时得到的masks 是一个列表,每个元素都是一个包含有关mask的各种数据的字典:
-
segmentation:掩膜mask;
-
area:mask的面积(以像素为单位);
-
bbox:mask的边界框;
-
predicted_iou:置信度;
-
point_coords:生成该mask的采样点;
-
stability_score:mask质量的附加度量值;
-
crop_box:用于生成mask的图像。
 1mask
 2# [{'segmentation': array([[False, False, False, ..., False, False, False],
 3#          [False, False, False, ..., False, False, False],
 4#          [False, False, False, ..., False, False, False],
 5#          ...,
 6#          [False, False, False, ...,  True,  True,  True],
 7#          [False, False, False, ..., False, False, False],
 8#          [False, False, False, ..., False, False, False]]),
 9#   'area': 380834,
10#   'bbox': [0, 320, 1079, 487],
11#   'predicted_iou': 1.0511808395385742,
12#   'point_coords': [[523.125, 468.28125]],
13#   'stability_score': 0.9827337861061096,
14#   'crop_box': [0, 0, 1080, 810]},
15# ......]
16
17print(len(masks))
18# 70
19
20print(masks[0].keys())
21# dict_keys(['segmentation', 'area', 'bbox', 'predicted_iou', 'point_coords', 'stability_score', 'crop_box'])
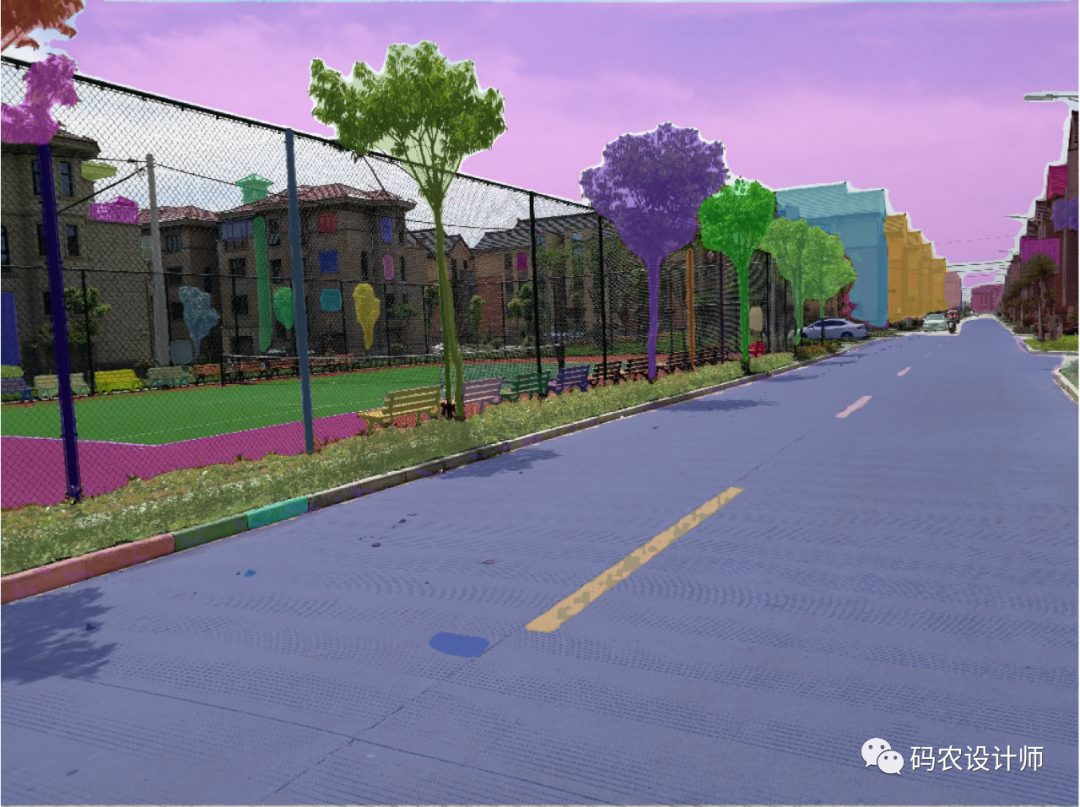
可以通过以下代码,将生成的mask覆盖在原图上:
 1def show_anns(anns):
 2    if len(anns) == 0:
 3        return
 4    sorted_anns = sorted(anns, key=(lambda x: x['area']), reverse=True)
 5    ax = plt.gca()
 6    ax.set_autoscale_on(False)
 7    polygons = []
 8    color = []
 9    for ann in sorted_anns:
10        m = ann['segmentation']
11        img = np.ones((m.shape[0], m.shape[1], 3))
12        color_mask = np.random.random((1, 3)).tolist()[0]
13        for i in range(3):
14            img[:,:,i] = color_mask[i]
15        ax.imshow(np.dstack((img, m*0.35)))
16
17plt.figure(figsize=(20,20))
18plt.imshow(image)
19show_anns(masks)
20plt.axis('off')
21plt.show()
效果如下所示:

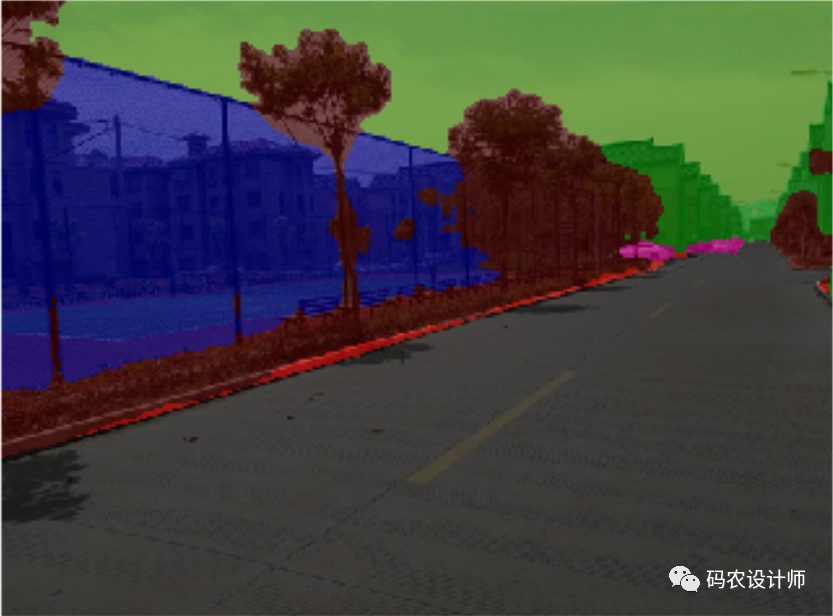
与之前本人在论文研究中使用谷歌开源的图形分割模型DeepLab v3+分割的效果对比,可以看出,SAM分割的还是比较细致的。

本次仅是简单跑个demo,更多内容可以查看GitHub页面:
1https://github.com/facebookresearch/segment-anything


本篇文章来源于微信公众号: 码农设计师
